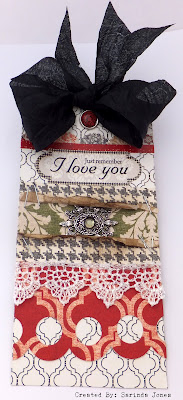
I finally got this tutorial finished. It took me a bit longer than I expected-!
Here is what you will need:
Chipboard or cereal box, various papers,
tags and envelopes, binding coil,
binder like a Cinch,
paper cutter/ trimmer, rule,
scissors, pen or pencil,
Multi medium or some kind of paste, foam brush,
bone folder, plain canvas or cute cloth.
Optional:
Velcro circles, bakers twine and
Silhouette Cameo.
This is the outside album cover size 7″ x 6″.
Cut 3 pieces of Chipboard, 2- 7″ x 6″ 1- 1.5″ x 7″.
Cut a piece of plain canvas to 9″ x 5″
I used Claudine Hellmth Studio Multi-medium Matte to adhere the canvas to the chipboard. You could also use Golden Matte Medium.
Trim inside papers to 5.5″ x 6.5″
Cut some kraft paper, white cardstock, map paper, dictionary paper, vellum paper. As an afterthought it would have been fun to add postcards and other unique items to the stack.
I also added some envelopes and tags. Using my Silhouette Cameo I cut out tags and holders fun pockets to hold various bits and pieces.
TIP: I also used some very small sticky
velcro circles to the flaps of the envelopes as closures.
Using my We R Memory Keepers Cinch to punch holes in all the papers, envelopes and tags.

Load the pages on a 5/8″ coil.
Cut patterned paper that will line the inside covers 2- 5 7/8″ x 6 7/8″ .
Round the 2 outside corners on each.
This photo does not show the rounded edges. You could use any sort of punch or fun edger.
Cut a piece of cardstock 6.5″ x 12.
Score the cardstock at 5, 5.5, 6, 6.5, 7.
Fold the middle score like a mountain and all the others like valleys.
Then punch holes with the Cinch add to the stack of paper on the 5/8" coil.
Put the scored/punched cardstock on the binder rings and squeezed them shut.
Place a mark where the cardstock
corner ends on the chipboard. This is as far as the gel medium will go to.
Apply a coat of gel medium to adhere the album to chipboard.
Adhere the album inside to the chipboard outside cover.
Then adhere the patterned paper to the inside of the chipboard.
Then I added some scrap paper to the front and Washi Tape.
NOW for the FUN part.....
fill your book with doodles, ephemera, ticket stubs, Instagram images and other fun goodies.
As I was creating this book I thought that these would make great gifts for some of my girlfriends. Please do not hesitate to let me know if you have any questions regarding this tutorial.
I hope you fun making your own mini album.
ENJOY-!


