Definition: Aggregate is a collection of items that are gathered together to form a total quantity.

The fleeting moments of knowledge in which we discover our existence are facts that can be committed to memory. We can enlarge this aggregate memory and refashion it as we go through a lifetime. By saving these memories on paper and reconstructing the images of our lives. We see the art of our lives unfolding before us.

Face the brilliance of your most wonderful creations and dwell on your dreams.
I believe in teaching, the sharing of ideas and playfulness of creating.
Showing posts with label chris cozen. Show all posts

Wednesday, February 19, 2014

Watercolor Tutorial and Artistcellar.com Stencils

Hello Creatives.....

Sarinda here as your mid week muse with a watercolor, ink and Pan Pastels tutorial. This color palette is one that I was working on in New York a few weeks ago and wanted to see how it looks in this medium. Then I will move onto incorporating it in a glass sculpture. Let me know if you like it?!

Here is what you will need:
Step 1:
I most always choose to do a color palette blending test first. So I used a sheet of watercolor paper that I knew that I would be working on and added two pure colors on the left of the page and the mixed 50% of each color on the right.

Here is the test that I did. You can do this with any colors you wish. Keep in mind warm colors play nice with warm colors and cool colors play nice with cool colors. Otherwise you might get an icky brown... Well I guess I could a good color too. :D
 Step 2:
Using the yellow/green and some light brown I made marks like a school of fish on the lower half of page.
 Step 3:
Here you can see that I added some sweeping reed like plants. Starting with the yellow/green, orange, light brown, medium brown and then black/brown. Don't think about it too much just make some marks.
 Step 4:
Adding some defining line work over the top of the dried watercolor to give some definition.
 Here is a detail of the line work.
 Step 5:
As you probbly know by now that I love the Playful Pods stencils a whole darn lot. lol. I wanted to add some Pan Pastels to the top layer in the lower left corner of thew work.
 Step 6:
Cut down the image to fit your mat and frame. I always work a bit larger to help with the composition of the frame. Sign mat and frame your art.
Here is a detail of the work. I love the flowing look of the watercolors and the colors. It reminds me of a warm summer day listening to the reed grasses sing in the wind.
Much love and kindness to you.
Warmly-
Sarinda

Wednesday, January 8, 2014

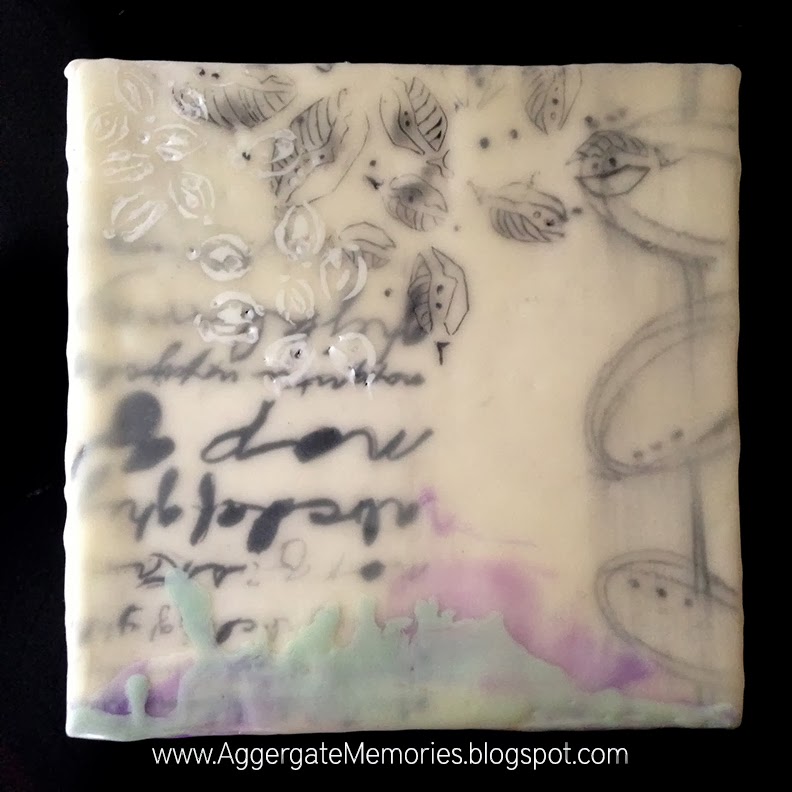
Encaustic and Artistcellar.com Stencils


Hello Creatives....

Sarinda here for your mid- week muse with a fun tutorial using Encaustic mediums by R&F Encaustic Paints and Artistcellar.com stencils. Well- there is a lot to talk about so let's get started-!!

Here is what you will need:

Step 1:
Prep the cradle board by taping the edge of the board so that it will not get wax on it.
Step 2:
Apply R&F gesso to the board and let dry completely.
Step 3:
Balzer Designs Alpha stencil outline the letters. On the finished piece some of the graphite will still be seen.
Step 4:
Outline some of the graphite tracings with a quill pen or a thin liner brush. I did not do all of them just here and there.
Step 5:
Doodle some ovals, lines and dots with charcoal. Take a rag and swipe the charcoal to smudge it.
Step 6:
Applying the encaustic medium.
Caution: Keep in mind that the wax should never fume or smoke.... keep heated under 200 degrees. The fumes are harmful to you.

Working in one direction swipe the encaustic medium across the board. Dip and repeat until there is an even coat on the board.
Step 7:
Slowly heat the surface constantly moving the heat gun around. Watch for an even shiny surface. Try not to over heat in areas. The goal is to get the surface as smooth as you can. Let the surface get entirely cold.
Step 8:
Scrape the surface to create the most even surface that you can. Try scraping in all directions to achieve this.

Anything that you add to a new layer it will need to be fused to the last with the heat gun. I added about 4 layers to the base for depth. This is where you will get the repeat button.... It will always look like this.

1-Base elements
2-Wax
3-Fuse
4-Cool
5-Scrape
6-REPEAT
 Step 9:
I laid the Playful Pods stencil on top of prepared surface. Then carved an outline into the wax and filled it in with dark gray R&F encaustic wax with a brush. Fused slightly. Once cooled completely I too a razor bade and scraped off the surface.

I was planning on doing an all black and white work. Yet- Purple was talking to me. SO I added a bit to one side and let it drip.

1-Base elements
2-Wax
3-Fuse
4-Cool
5-Scrape
6-REPEAT
 Step 10:
Wanting a bit of white to pop off the surface and another layer of depth. Carved another Playful Pods stencil in the surface shown below.
 Filled with white R&F encaustic wax and slightly fused.
 Cool completely and then started to scrap.
This is how the surface looked after scraped.
Keep going until you feel it is done then hang on your wall and enjoy-!!

Hope you had fun.
Best
Sarinda

Wednesday, September 4, 2013

Kilnformed Glass with Artistcellar Stencils

Hello Creatives-

I am Sarinda Jones and I am a full time kiln formed glass artist with a passion for all things paper. I am thrilled to be participating in this amazing Design Team and Artistcellar. I hope you will be inspired to create something that I bring to you. For me it is all about playful creating. Although you will see me use a lot of different mediums. I thought today I would share a tutorial using Artistcellar Playful Pods stencils and kiln formed glass platter. Just in case any of you wanted to know more about how the glass process works.

Here is the Playful Pods Stencils.... "By the way... MY Fav Chris Cozen"

You will cut two 8"x8" clear glass sheets.

Placing the stencil onto the cleaned glass you will see that there is some space around the edges. Taking paper to cover up the entire edges of exposed glass.
Tip:You can also use Ducktape on the edges of the stencils to help with this issue.

Here I am creating the top layer glass detail with Bullseye Powdered Black Glass. Using a sifter to apply the power glass to the stencil.
IMPORTANT: You Must Must wear a respirator while using any powder glass or small particulates. As you do not what that to settle into your lungs. It does not come out.

Lightly tap sifter to disperse the power glass onto the stencil.

Just for fun this is how I look working with this stuff. Not the funnest thing while in the summer months. lol.
I digress, Back to the tutorial-!

VERY carefully remove the stencil and tap powder back into the jar.

Now I am creating the bottom layer for the kiln formed glass platter. Using 4 colors of coarse frit glass, Aqua, Amber, Rhubarb and Red. What "frit" means is the glass has been broken into small chucks and sifted into different particulate sizes, from powder, fine, medium and coarse. It is to use as accessory glass and will create some interesting bubbles and textures within the finished glass platter.

Working on top of the kiln shelf and thin fire paper, you will mark the corners of the 8"x8" clear glass blank. Then add the coarse glass frit inside the outlined square.

Add one cleaned clear glass blank onto the glass frit.

Next you will add the clear glass with black glass powder detail on top of the other. Careful not to disturb the powder glass.

This is how it will look all stacked together.

Now- the stack goes into the kiln and fires up to 1500 degrees for 14 hours. This will fuse all the layers together and become one thick sheet of glass.
This is how the sheet looks after the firing.

Detail of the glass sheet.


The last step is to put it back into the kiln on a ceramic mold for another firing to slump the glass slab into a plate shape. Yes- another 14 hours. This is always done as a second firing as you can not full fuse and slump at the same time. They are different firing schedules and temperatures.
Here is the finished piece.

I hope you have enjoyed looking into the world of glass with me.
Again- I look forward to working with Artistcellar and the Design Team. I have enjoyed being inspired by the last DT and find this an amazing opportunity.
Have a creative day.
Warmly-
Sarinda