Definition: Aggregate is a collection of items that are gathered together to form a total quantity.

The fleeting moments of knowledge in which we discover our existence are facts that can be committed to memory. We can enlarge this aggregate memory and refashion it as we go through a lifetime. By saving these memories on paper and reconstructing the images of our lives. We see the art of our lives unfolding before us.

Face the brilliance of your most wonderful creations and dwell on your dreams.
I believe in teaching, the sharing of ideas and playfulness of creating.

Wednesday, October 31, 2012

Stampotique SDC72: Funny Halloween


Astrid Stulemeijer is the host of Stampotique challenge this week.
She is asking us to be creative in a humorous way.
(((Giggles)))

This will be a great challenge so be sure to check out the Design Team projects.
All of these Ladies have a GREAT sense of humor. Mostly Dry.
I Love them.

So what I did on this tag:

I used my Silhouette to cut tag, the quote bubble and the Oh Snap!.
The background is a Tim Holtz technique, Alcohol Agates using
metallic gold, butterscotch, peach Bellini, sunset orange, red pepper and slate on glossy paper.
Stamps:
and 
Tim Holtz Skeleton with head cut off 

Then assemble everything find a snap for the "O" in Oh Snap!
add ribbon and button.

Wishing you a Hilarious Holiday!
Sarinda

Monday, October 29, 2012

Happy Halloween....


Happy Halloween-!


Truly my favorite Holiday of the season.

Wishing you the very best in your hauntings this week.
And if the Broom fits.... you must ride it-!!!

I created the witches (inside the house), house and tree with my Silhouette Cameo.
The house: I used black cardstock and black glitter for the roof and 
Tree & witches: Black cardstock.

The stamps I used are from Stampotique:

Saturday, October 27, 2012

Background Technique #1


Hello Art Makers....

I have been getting some questions regarding some of my background techniques.
With that I will be doing a video series of some different techniques, this being the first. Some that I have learned along the way and some of my own creation and experimentation.

I hope you find this useful and add your own spin on it.
Try layering the paint from light to dark and dark to light.

Tip:
 I would start out by using colors that play well together.
So you don't get the muck and mire.

A good choice is to stay in the same color group. 
Dark Red
Med Red
Light Red


Wednesday, October 24, 2012

Stampotique SDC71: Inspiration/Case Study

  Good Morning....
Today Jenn would like us to be inspired by someones work.
I was inspired by my teammate Maria's work here is the link to her inspiration.
Mind you it is not exactly the same...
I was not going for Plagiarism. 
I went for her layout as inspiration.
If you would like to play along to win some goodies from Stampotique click on the link.
Remember that you can use any stamps for our challenges.
There is a lot of "Inspiration" on our Design Team blog.
So don't forget to check that out.

Stamps I used are:
Carrot and
I carrot 'bout you.

SDC71: Inspiration/CASE Study


Good morning Stampotique Originals followers and friends.  

My name is Jenn and today I have a very inspirational challenge for all of you, that is we want to be your inspiration!  Yes, the challenge is to use us (i.e. the Stampotique Originals Designers) as your inspiration.   Pick any one of our cards, journal pages, 3D projects or altered items as the inspiration for YOUR original piece.  Some people refer to it as "casing" others call it "to case study".  All in all it refers to using someone else's original piece as your inspiration.  Whether it be the colors, the medium, or the shape...or maybe even the stamp.  Let our DT inspire you to make an original project.  Cannot wait to see what your inspiration will be!

Sunday, October 21, 2012

Copic Marker Tag Tutorial


Relax Tag By: Sarinda Jones
What you will need:
Manila Tag Ranger
Stampendous! Jumbo Dalia stamp
(or any stamp that has white space)
Sentiment Stamp
Archival black ink
White button
Bakers Twine
White Satin Ribbon
Walnut Stain Distress ink
Ink blending tool Tim Holtz

-->
Step 1
Stamp tag with Archival black ink and Dahlia stamp. Stamping only part of the Dahlia.
-->
Step 2
Take out Copic markers set; find RV23 lightest, RV25 medium and RV29 darkest. Start with RV23 Brush tip and with long strokes fill in the petals. Leaving a bit of white space.
Step 3
Take Marker RV25 Medium color. Go into the center of each petal and accent the shadow.
-->
Step 4
Then take RV23 the lightest color. Go back over the RV25 to blend together.
Step 5
Take the RV29 Darkest color. Going into the most center of each petal add just a touch of the RV29 for depth. Dot over the center of the flower. Then take the RV25 and blend in the darker color. Then the last blend with RV23 lightest color. I know it is a lot of blending but worth it.

Note: The edges of the petal only have the first layer of the lightest color RV23.


Step 6
Add your sentiment stamp to left of tag. Distress the edge of your tag with Tim Holtz Distress ink in Walnut Stain with blending tool. This helps pop the images on the tag.


Step 7
Take your white or cream satin ribbon add a spritz of water. Take RV25 medium color and color onto the ribbon, dry with heat gun. I love the streaky look this adds to the ribbon. Tie to the top of the tag add the button and bakers twine. Then snip off the ribbon to your desired length


This can tutorial can be done with any stamp...!!
Be Creative and Have Fun.
Sarinda

Tuesday, October 16, 2012

Fotobella Giveaway..... You could be the winner-!

I am giving away this DREAM BIG mini

 If you want to win you need to go to Fotobella's blog here and comment as well as 
go to the facebook page and like Fotobella and leave a comment.

Below is the post from Fotobella.com


Handmade Mini Album Giveaway


Our design team member, Sarinda Jones has a few design team projects she would like to giveaway to some lucky friends of FotoBella.
She was nice enough to provide the step-by-step tutorial to create this gorgeous Dream Big Mini Album using the Tell Your Story Bundle by Teresa Collins and now she is generously going to give it away! How wonderful is that? 

To be entered to win:

1. Leave us a comment on this blog post telling us what one of your BIG DREAMS are (if you care to share)

and...

2. Hop on over to the FotoBella Facebook Page to LIKE us and leave us a comment that you'd like to win the Dream Big Mini Album.

We'll pick one random winner this Saturday, October 20th and announce it here on the blog as well as on our Facebook Page.

Good luck and happy scrapping!

Monday, October 15, 2012

Floral Design....


Hope your weekend was wonderful...
I have been helping a friend with some floral design.
OH My I am having fun...
I love flowers and have done some arranging here and there.
But- Nothing like this... Full creative licence.
Now I need to go to the glass factory and really work.
Thanks for checking in.
Sarinda

Saturday, October 13, 2012

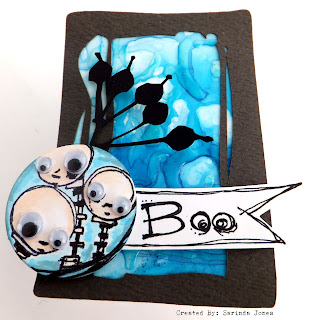
ATC Halloween Exchange


Hello and Happy Monday to you.

I was invited to participate in a ATC Halloween Swap... 
THANK YOU-!
ATC are small works 2.5"x3.5".
SO rather than recreate the wheel... 
I took some of the cards and journaling pages and made 
miniature works of them for the swap.

So much fun and I can't wait to see what comes to me.
Hope you are all well.
Take Care-!
Sarinda

Friday, October 12, 2012

Package from Two Peas & Faber-Castell


Hello Artisans....

Here are my winnings from Two Peas and a Bucket & Faber-Castell Challenge.
Here are the tutorials from my mixed media bag.

I quickly made this tag playing with the gesso and metallic gelatos.

Thank you again to 
and 

Thursday, October 11, 2012

I am a Guest Blogger at Two Peas....


I am so excited .....
This was a post that I did a while back on how to make paper earrings.
Here is the link to the blog post at Two Peas.
for highlighting one of my posts.

 Have a wonderfully creative day...
sarinda

Wednesday, October 10, 2012

Stampotique Challenge SDC69: Scrap IT!


DWELL ON YOUR DREAMS-!!

I had so much fun making this page...
Yes that is my feet in the image on the hammock and 
I was taking in the sun of the spring
contemplating my navel.
These are the moments when artists have their genius come to the forefront.
I love taking the time to do this and everything around me is better when I do. 
Even if it is just for a few indulgent moments.

The stamps that I used are:
2007 Spray (the center of the large flower)

SDC69: Scrap It!

"It's my turn to set the theme this week at Stampotique Designer's Challenge so I decided on something that I usually avoid- using photographs along side stamping.

No.... come back... don't panic, it's not as scary as it sounds!

As a non-scrapper I too feel that fear that perhaps washes over so many when the word 'scrapping' is mentioned, but this challenge theme can incorporate your photographs in anyway possible either on a page, inside a journal, on a canvas, a mini book, an altered item...anything you wish, just as long as you are using stamping somewhere too.

If you are a natural scrapper, this theme couldn't be better! And if you are not, make it work for you.

Please take a look at the fantastic contributions from the team to see how diverse the artwork has turned out to be."

Jo Capper-Sandon

Tuesday, October 9, 2012

Mini Journal for October 9th


Happy Tuesday...
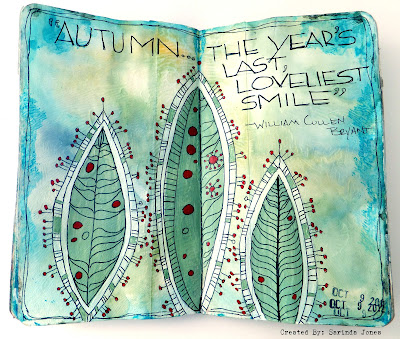
Here is a journal page that I finished today.
The mornings hold a layer of frost on the grass that glistens in the early sun.
The leaves have a kiss of red with the tale tale sign that they are sure to fall soon leaving the naked branches of the trees. I love fall and the crispness to the air.

Today I felt inspired to doodle... a kind of meditation for me and this is what came out.

I always prep my pages with gesso and a wash... I do as many as I can at a time.
Then when I am inspired all I have to do is pick one that has the colors that are
good for that page. SO Yes my journal skips around in dates... This does not bother me in the least.

It is kind of the way I talk any how... Ha ha. 
You have to stay tuned into at least 3 stations at a time.

Wishing you warm reflections on your fall days.
Sarinda

Sunday, October 7, 2012

Stampotique Halloween Paper Earrings.


Hello Crafties...
I wanted to make some earrings this weekend 
and of course Halloween is in full swing at my house. 
I used Stampotique Stamp
This stamp has a lot of use as of late... SO if you want a stamp from Stampotique 
I would strongly suggest this one. It comes with 4 stamps in one.
Cheers!
Sarinda

Friday, October 5, 2012

Inspired Tag.... Fotobella.com Vintage Finds by Teresa Collins


  Good Morning....
Hope this is a start to a creative weekend for all of you.

I wanted to share a Fotobella.com creation.
This was made with Teresa Collins Vintage Finds Bundle.
You will be seeing more of this bundle from me.
 OMG... There are so many things in the bundle.
As you can see here I hardly used any of this. 
It comes with a LOVELY Bling crystal and pearl trinket.

Pan down for the tutorial...

Also- I wanted to share Fotobella.com New Design team...
Wow what talent.
These Ladies are going to rock it out of the park.
Check out their blogs. 
I am so excited to play another 6 months with the team.
Thank you!
Fotobella.com
NEW DESIGN TEAM
Apryl Holland
KimberlyRae Ford
Kim McMahon-Rosenberger 
Sarinda Jones (((You are here)))
 
Jeri Vann
Tutorial...
What you will need:
Stapler
2 Kraft Tags Tim Holtz/ Ranger
Black ribbon
Twine
Safety Pins

Step 1
Cut one of the two tags to 2.5”
Punch holes into the bottom of full tag and the top of the cut tag, about .25” from edge.


Step 2
Cut 2.75” x 5.25” strip from Orange Damask Paper and also cut for small bottom tag 2.75” x 2.25” Distress edges. Glue to tag.


Step 3
Cut 2.5” x 5” Music paper and also cut for the small bottom tag
2.5” x 2” Distress edges. Glue to tag.


Then take the small bottom tag and rip in half Roll the inside edges of the paper, the ripped edge.


Step 4
Find Inspire flashcard and place under ripped music paper. Glue in place.


Then Staple the two edges.


Step 5
Find the sticker sheet. Find the honeycomb stickers. Black, orange small dot, yellow half, 2 line half. Place on upper half of tag like image below.


Step 6
Cut sparkle banner strip for the ends of the badge tails. Approx. 2.5”
Find the tickets 61 & 5.
Then find the chipboard circle with damask design.


Assemble and glue like the image below. 


Step 7
Find the black bling and place onto the tag like the image below.


Step 8
Add Safety pins to attach the two tags.


Step 9
Take the black ribbon cut approx. 4 inches thread it through the top hole of the tag.


Find white leaf button add twine to the button like image below.


Tie bow. Find Crossed hatched button and add to tag next to large black bling.